
How to Assess Your Lawn Before You Start Fixing It
Quick Answer
Assess a lawn by identifying the grass type, estimating what share is actually desirable turf, cutting a plug to measure thatch and rooting, testing compaction with a screwdriver, reading the weeds as site indicators, checking for insect damage, and sending a soil sample. Those findings tell you whether to overseed, renovate, or start over — before you spend anything.
At a glance
- What you are deciding
- Whether this lawn needs better maintenance, overseeding, a full renovation, or a site fix that no amount of seed will solve.
- The number that decides it
- The share that is desirable turfgrass. Roughly 40 to 50 percent is the threshold between renovating in place and starting over — and perennial grass weeds override it entirely.
- How to confirm
- Cut a plug for thatch and rooting, push a screwdriver in for compaction, read the dominant weeds, tug-test damaged areas, and send a soil sample.
- What it is not
- Not a product problem. Nothing you can buy substitutes for knowing which of shade, compaction, drainage, thatch or pH is actually limiting the lawn.
- Urgency
- Low, except where water stands for hours or moves toward the foundation. Everything else can wait for a soil test to come back.
- When to call someone
- Grading and drainage faults, a spreading problem that persists after the basics are corrected, or any application needing a licensed applicator in your state.
Most lawn spending is guesswork. A thin, patchy lawn gets fertilizer, then weed killer, then more seed, in whatever order the garden centre suggests — without anyone establishing why it was thin in the first place. Penn State puts the principle bluntly in its renovation guidance: renovation should not be attempted unless steps are taken to correct the underlying cause of the deterioration.
This is the assessment that finds that cause. Eight checks, about an hour of work, one soil sample. At the end you will know whether your lawn needs overseeding, a full renovation, or just a different mowing height.
Why Assessing First Saves Money
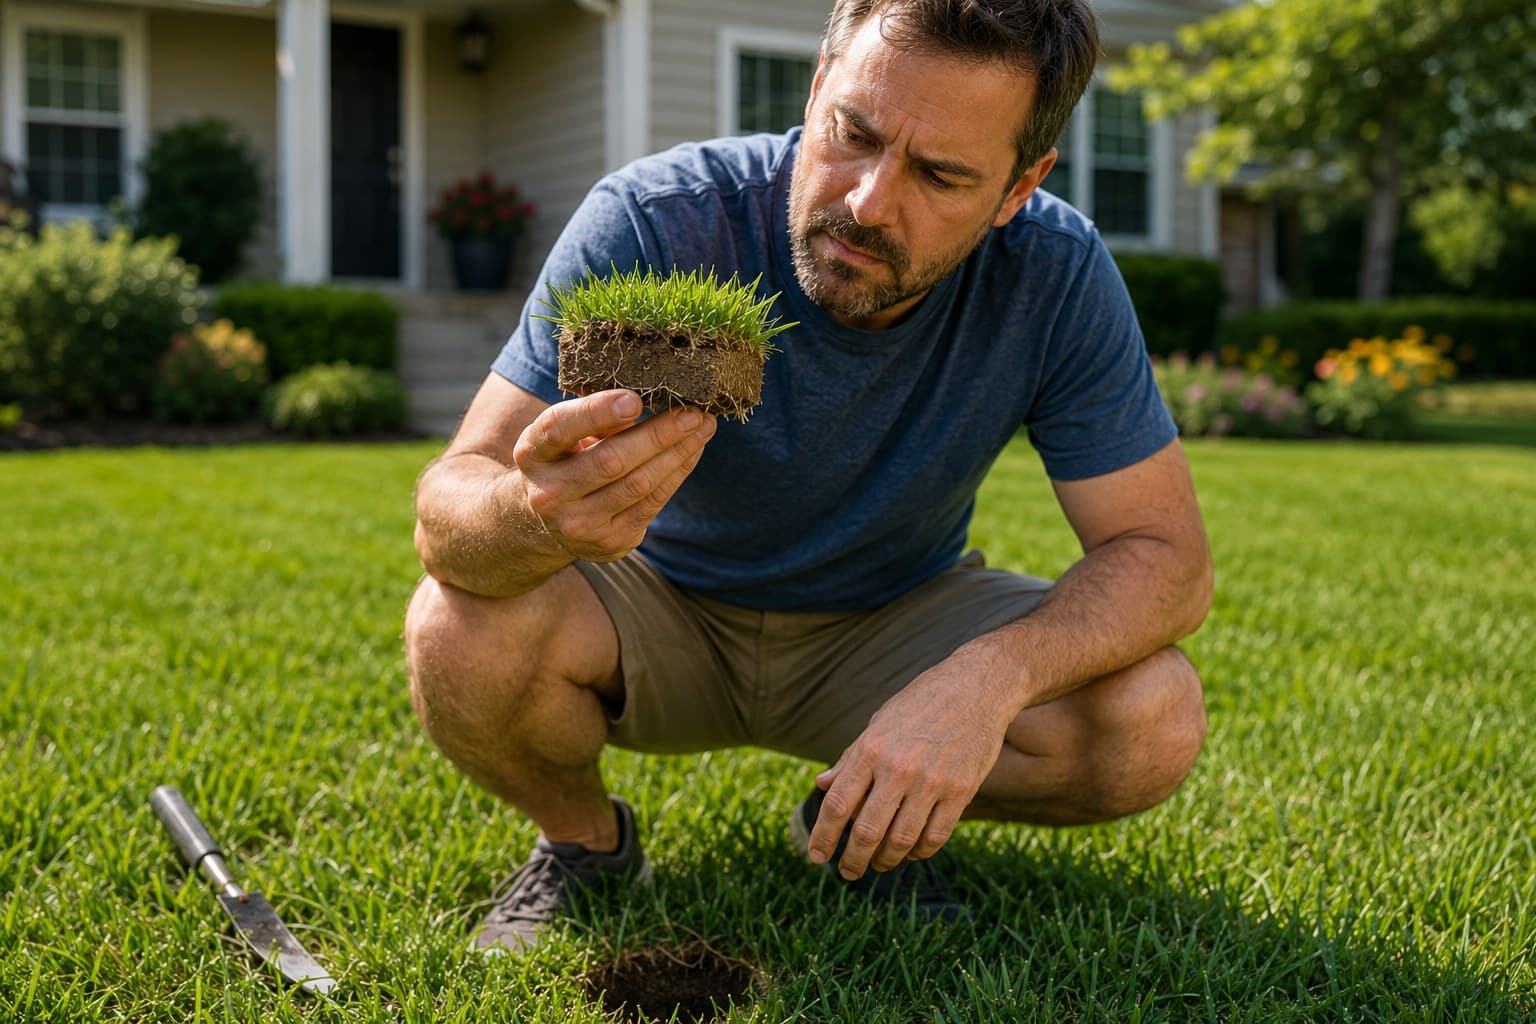
Every common lawn treatment is the right answer to one specific problem and the wrong answer to several others. Fertilizer does nothing for compaction. Aeration does nothing for shade. Herbicide does nothing about the thin turf that let the weeds in. Applying the wrong one costs money and a season.
Assessment also protects you from the opposite error — doing work that was never needed. Aerating an uncompacted lawn and dethatching a lawn with a quarter inch of thatch are both common, both stressful to the turf, and both entirely avoidable with a screwdriver and a spade.
What You Need
- A long screwdriver — compaction and soil moisture test
- A spade or soil knife — to cut a plug and see the profile
- A ruler — to measure thatch depth and mowing height
- A tape measure or your phone — to size the lawn and its zones
- A clean bag — for the soil sample
- Something to write on — a sketch of the lawn beats memory
Assess during active growth, not dormancy
Step 1: Identify Your Grass Type
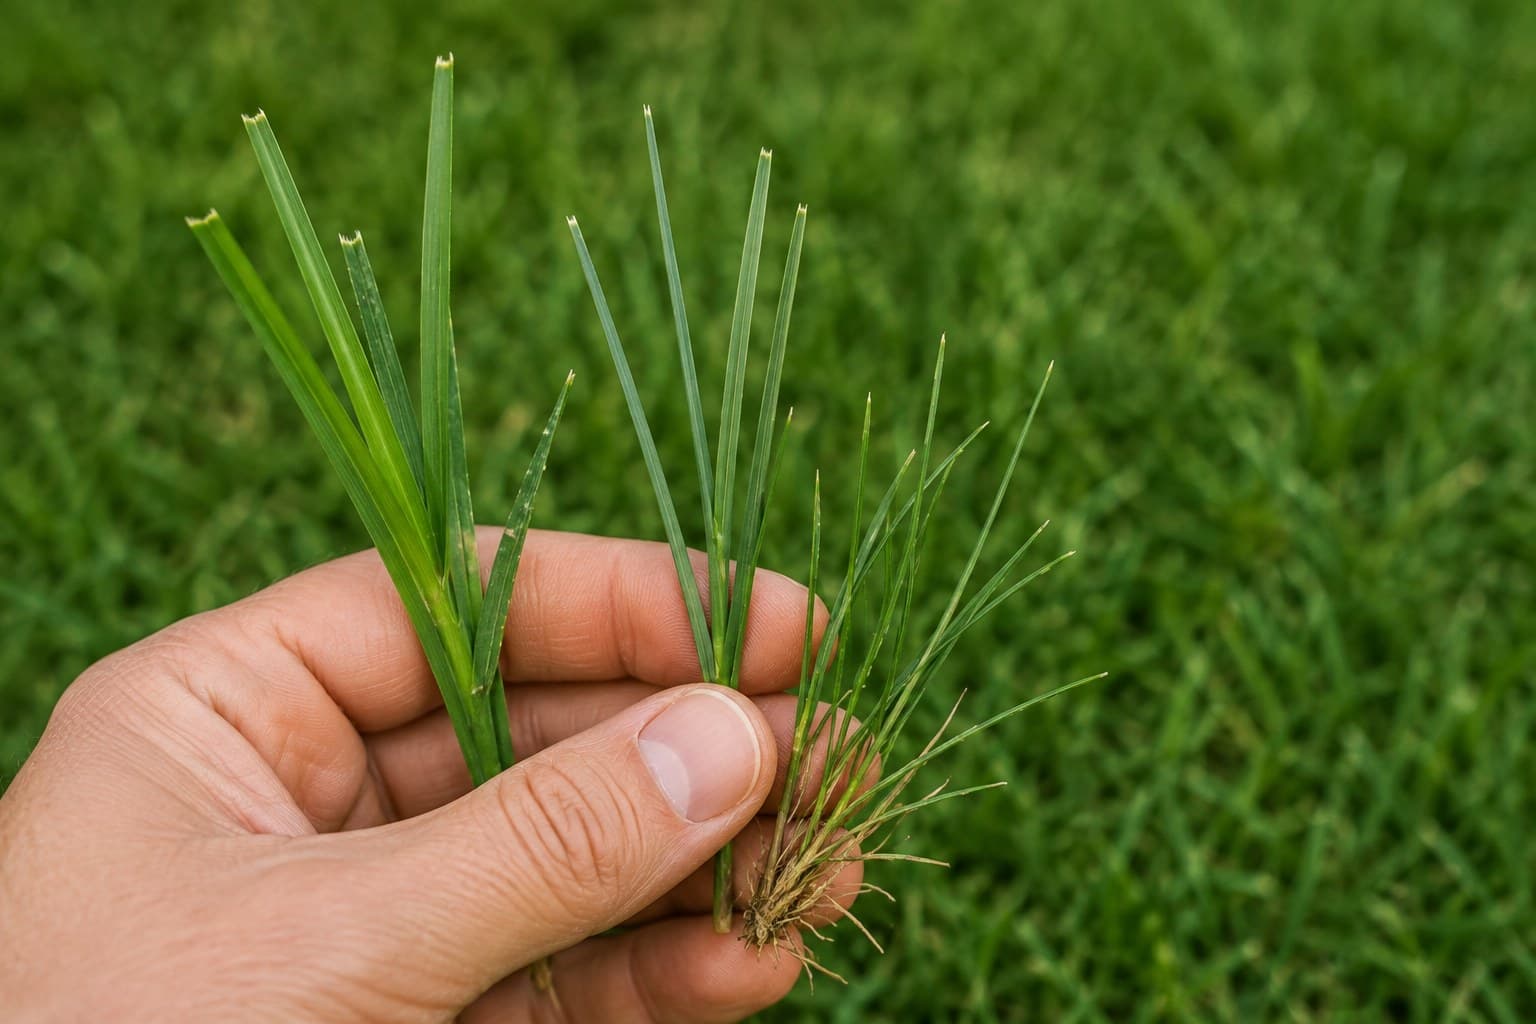
This determines the correct answer to nearly every question that follows: mowing height, watering needs, feeding schedule, what dormancy should look like, and which problems are even plausible. Penn State lists poorly adapted species as among the most common causes of lawn deterioration — a lawn can be perfectly managed and still fail if the grass does not suit the site.
Start with climate: cool-season species dominate the North, warm-season the South, and the transition zone supports both awkwardly. Then narrow by blade width, growth habit, and colour. Our grass identification guide walks the process, and the grass types hub compares species side by side.
Note if you have more than one. Mixed stands are common and normal, but a patch behaving differently from the rest of the lawn is often a different species rather than a disease.
Step 2: Measure the Lawn and Map Its Zones
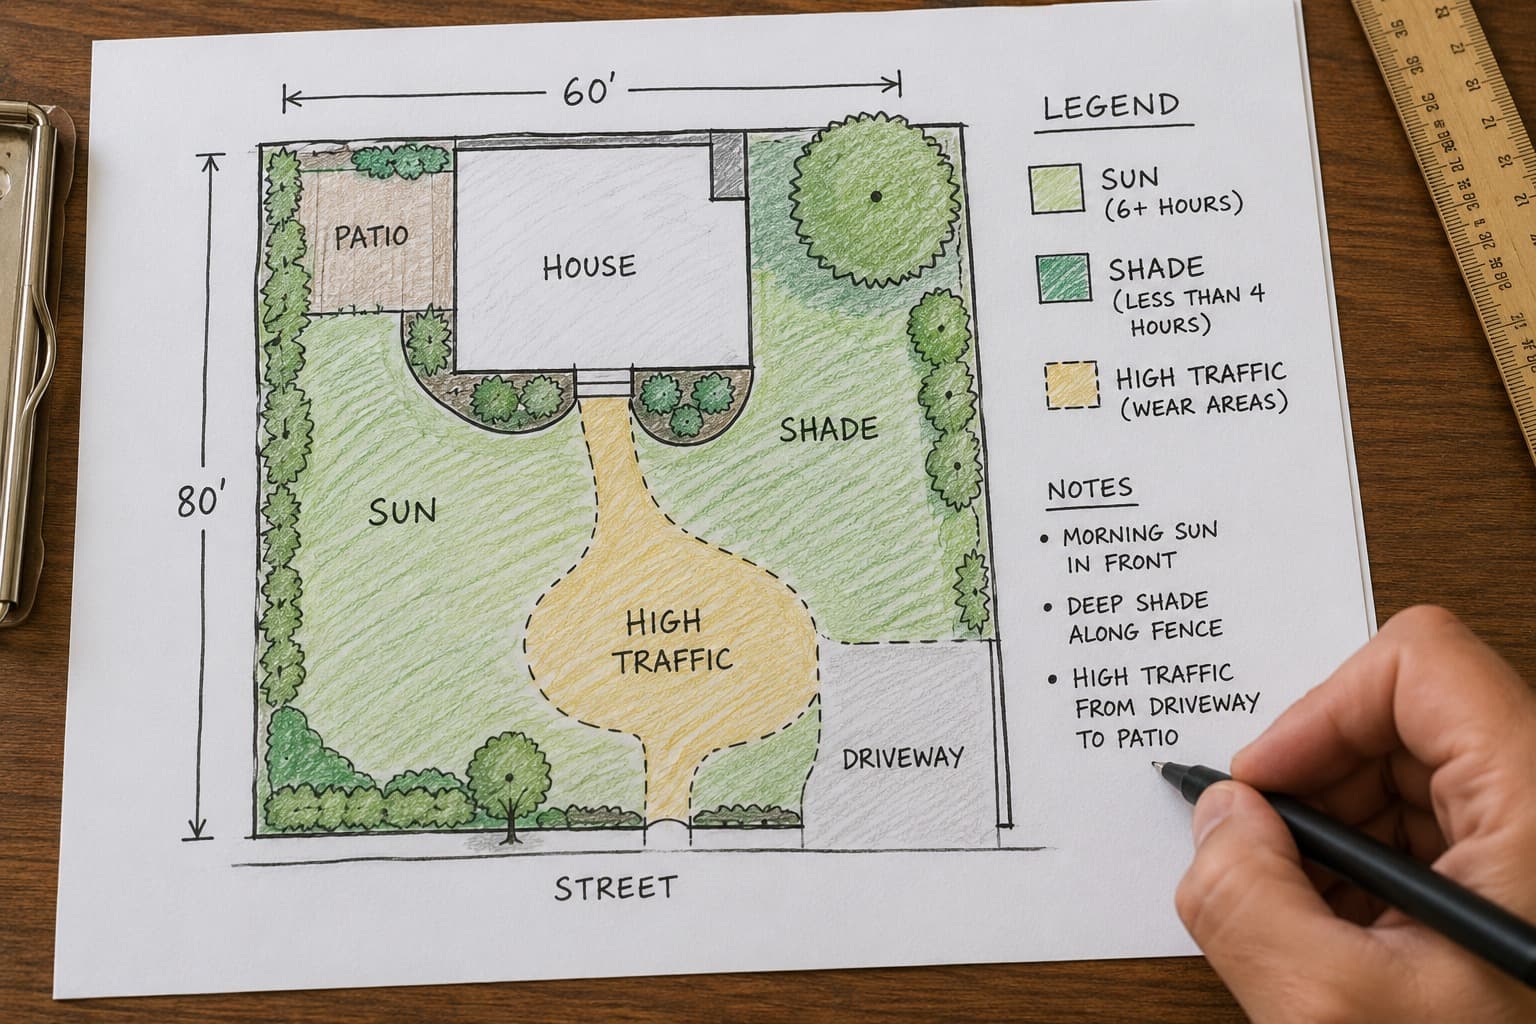
You need the square footage for every product decision you will ever make — seed, fertilizer, lime, topsoil are all specified per 1,000 square feet. Our lawn area calculator handles irregular yards by summing simple shapes.
Then sketch the lawn and mark what varies across it. A lawn is rarely one environment, and treating it as one is why the same programme produces a good result in the open and a poor one under the maple.
- Sun and shade — note roughly how many hours of direct sun each area gets. Check morning and afternoon; a spot shaded at noon may still be fine.
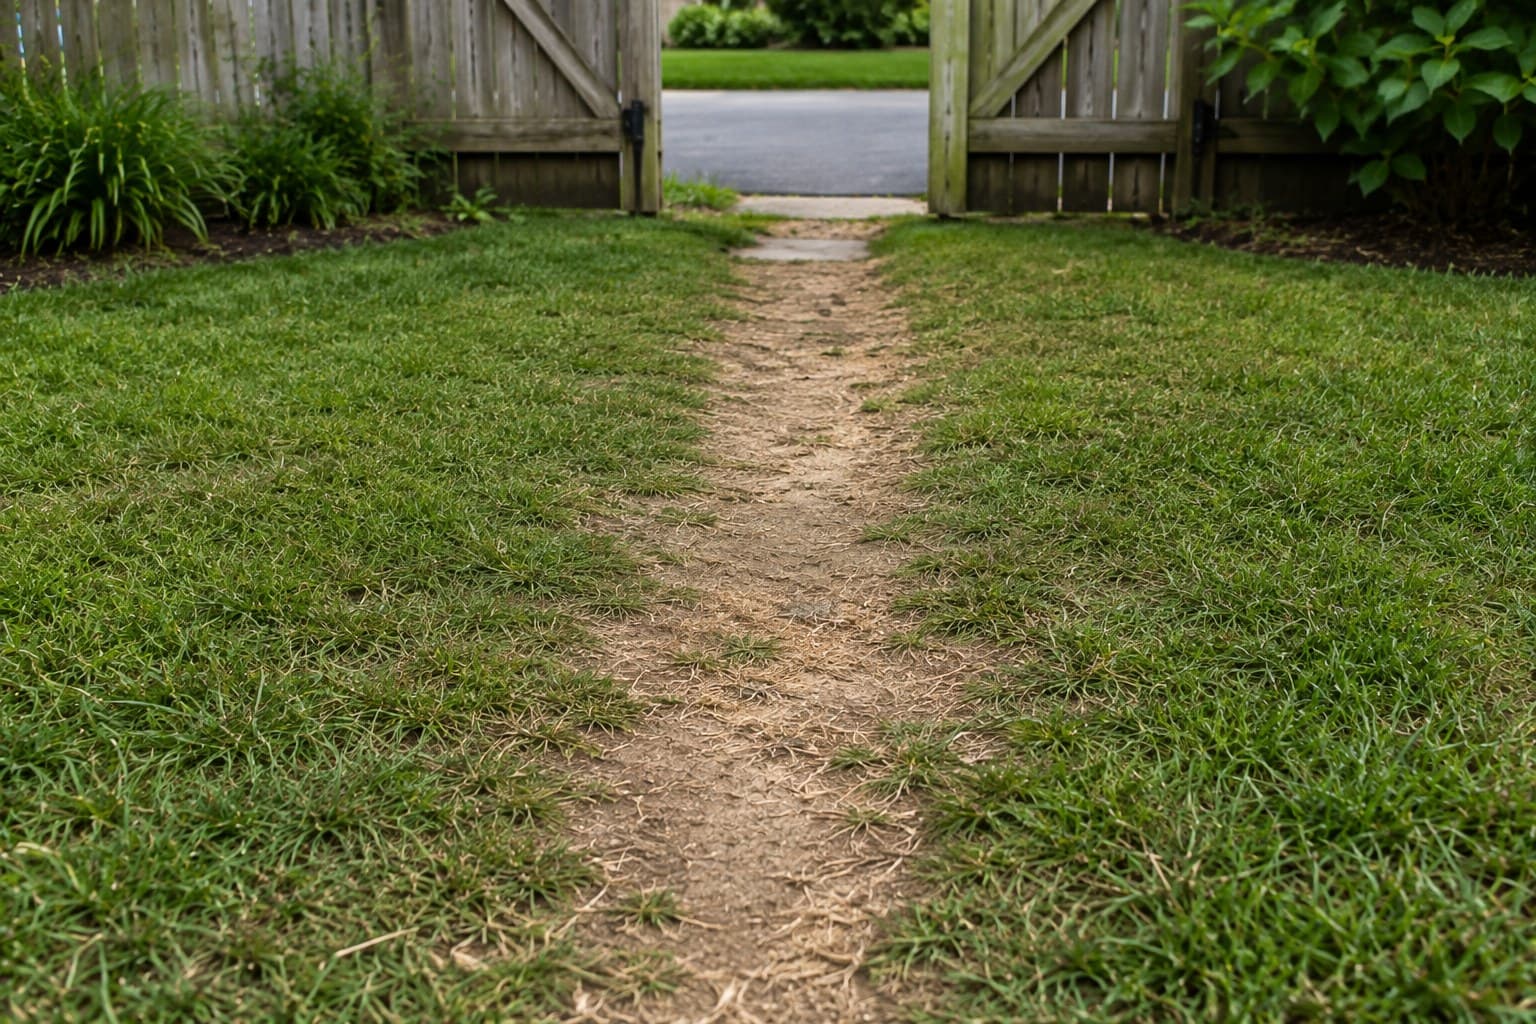
- Traffic — paths, gates, play areas, where the dog runs. These are your compaction candidates.
- Slopes and low spots — where water runs off and where it collects.
- Tree root zones — trees compete with turf for water and nutrients, not just light.
Step 3: Estimate How Much Is Actually Desirable Grass
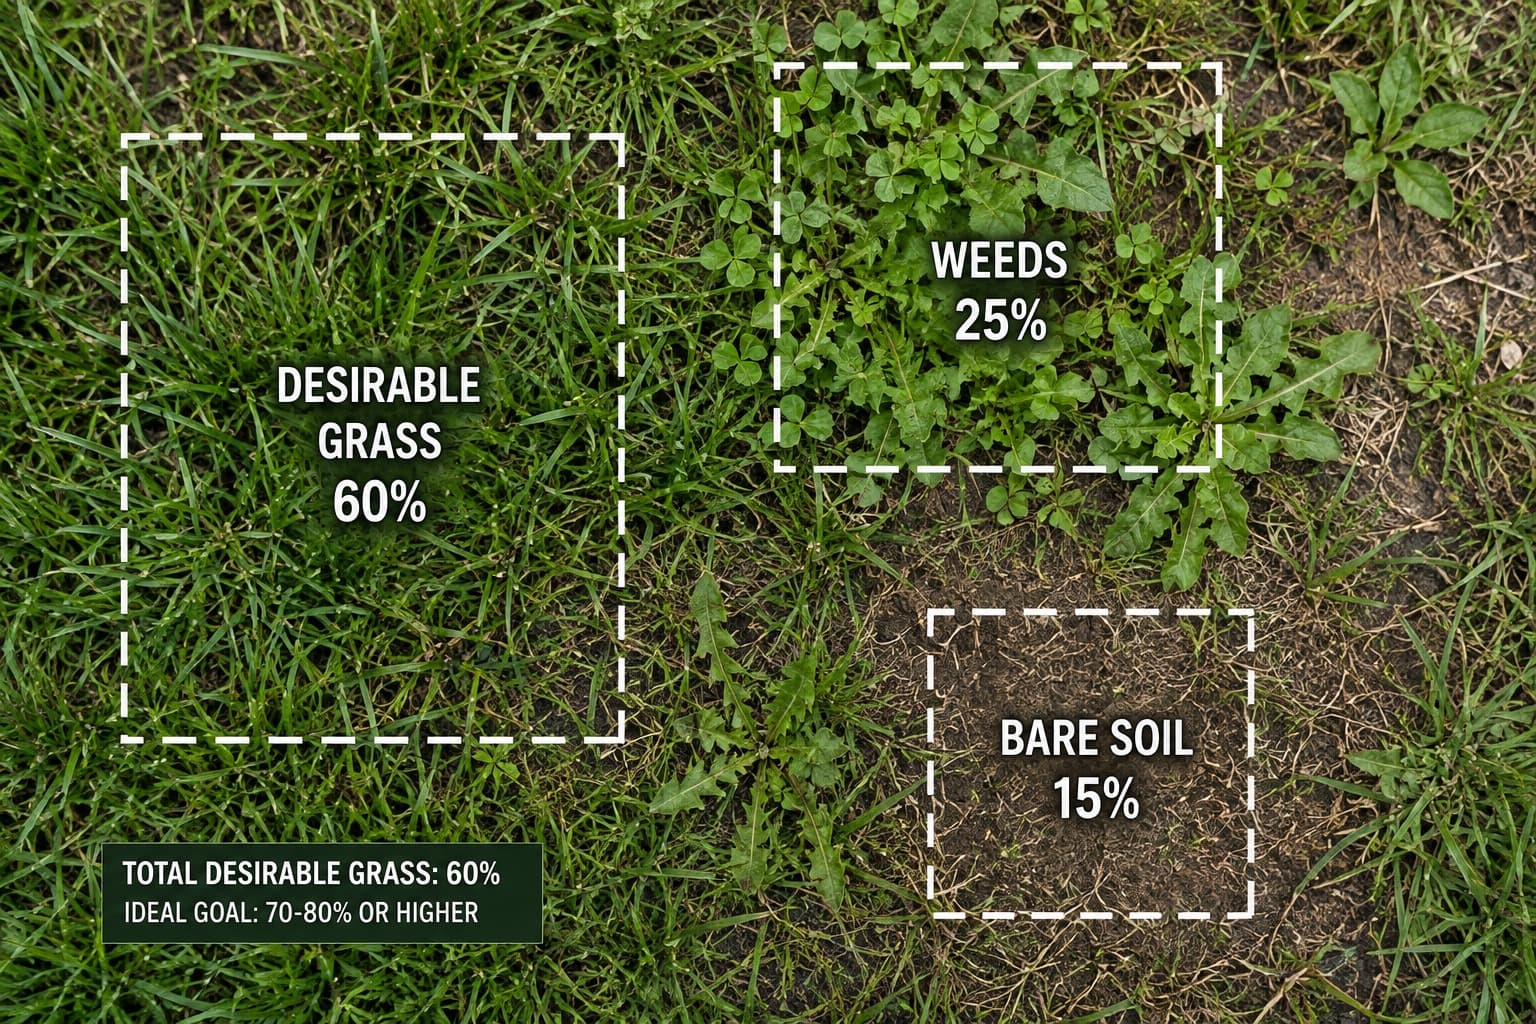
This single number does more to determine your plan than anything else on the list. Walk the lawn and estimate what proportion is the grass you actually want, as opposed to weeds, unwanted grasses, moss, or bare soil.
The threshold to remember is 50 percent. Penn State’s renovation programmes split on it: at or above 50 percent desirable turfgrass — with no perennial grass weeds and thatch under half an inch — you can renovate in place by controlling broadleaf weeds and overseeding. Below 50 percent, or where perennial grass weeds like bentgrass, nimblewill or quackgrass have taken hold, the realistic route is killing the existing vegetation and reseeding.
Perennial grass weeds change the answer on their own
Do not over-count small gaps. Missouri Extension notes that bare patches under about 4 inches across usually fill in on their own given proper fertility, without any reseeding.
Step 4: Cut a Plug and Look at the Profile
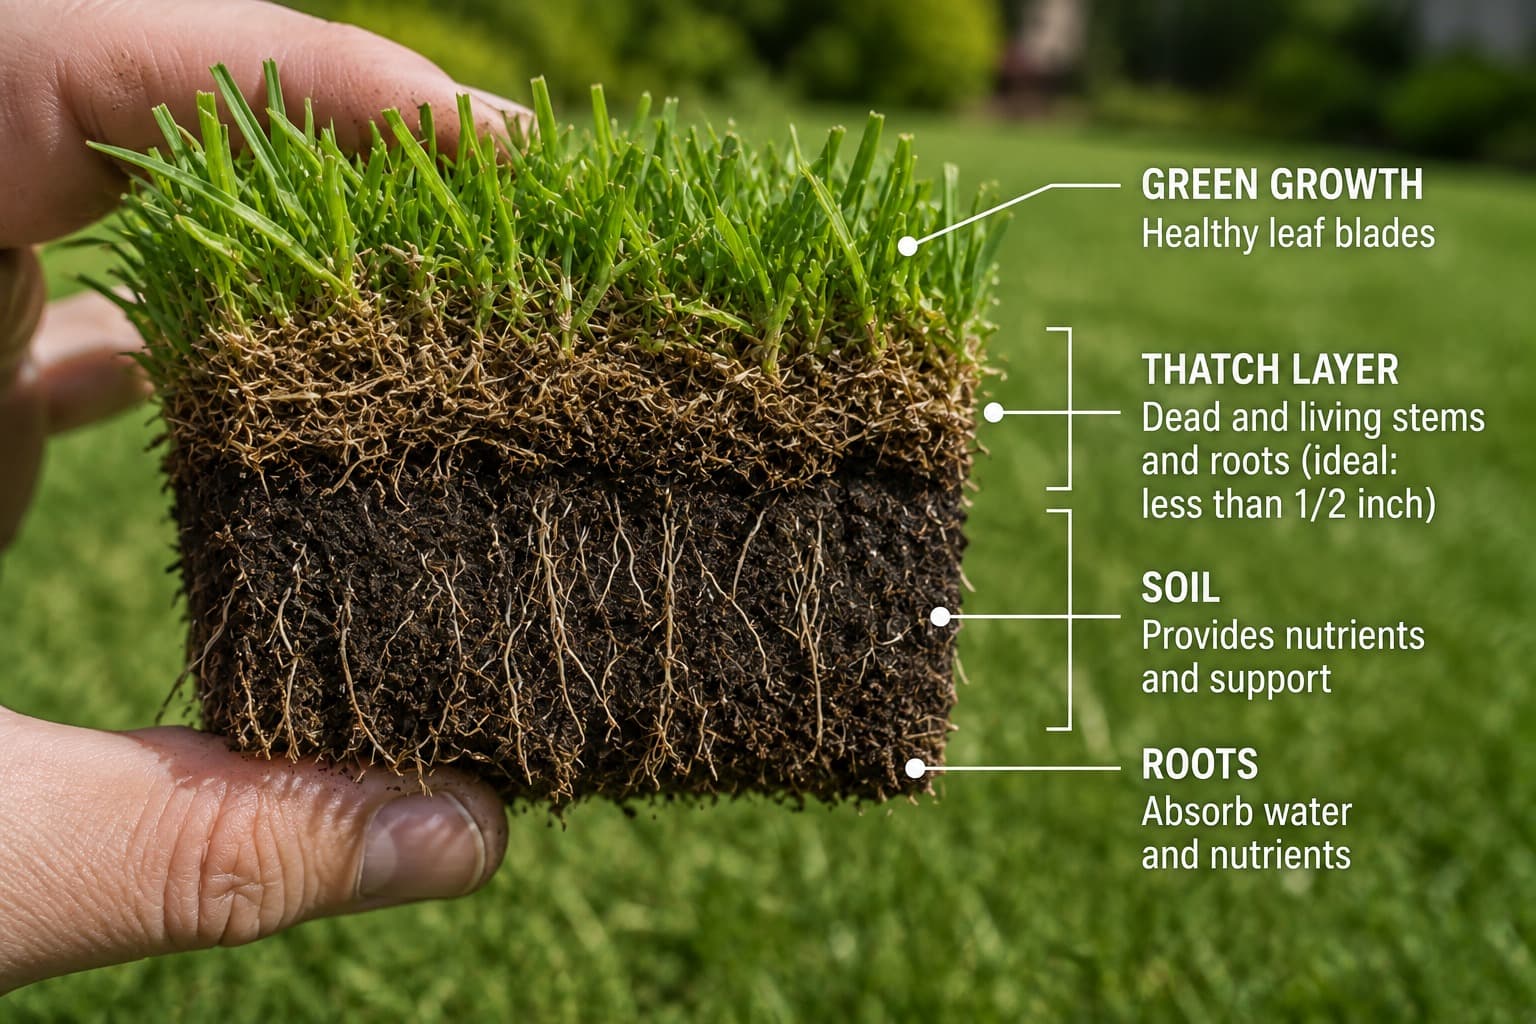
Push a spade in and lift a wedge about 3 to 4 inches deep. This one cut answers three questions at once. Do it in two or three places — a good area and a struggling one.
| What you look at | Healthy | Warning sign | What it means |
|---|---|---|---|
| Thatch layer (spongy brown, between green growth and soil) | Under 1/2 inch | Over 1/2 inch | Thatch above 1/2 in restricts water, fertilizer and pesticide movement into soil, and roots dry out in it |
| Root depth | Several inches, white and fibrous | Short, shallow, confined to the top inch | Usually light frequent watering or mowing too short — not a soil problem |
| Root colour and condition | White to cream, firm | Brown, mushy, or chewed off | Brown and mushy suggests disease or waterlogging; chewed off suggests grubs |
| Soil texture | Crumbly, holds shape loosely | Sticky and dense, or gritty and loose | Heavy clay or sand — changes your watering frequency, not necessarily a problem |
| Layering | Gradual transition | Abrupt line between two soil types | Imported topsoil over untouched subsoil acts as a drainage barrier and stops roots |
Thatch over half an inch is the trigger for dethatching — see our dethatching guide. Below that, leave it alone. Penn State also advises never removing all the thatch in a single treatment.
Step 5: Test Compaction and Drainage
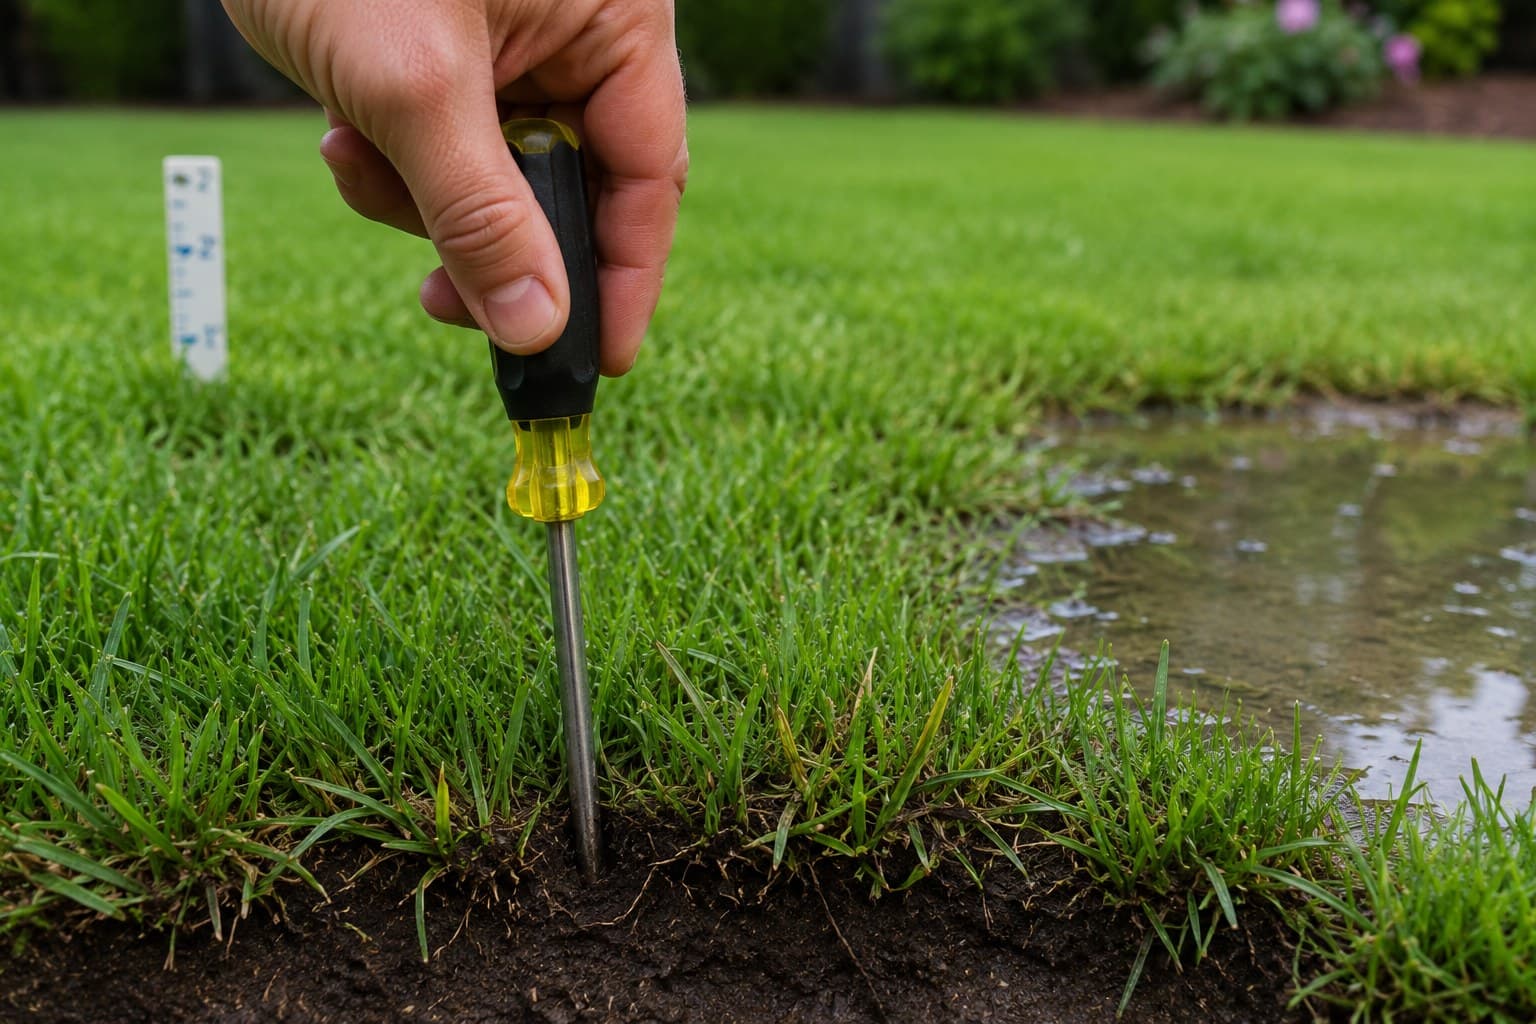
The screwdriver test
On moist — not saturated — soil, push a long screwdriver into the ground with light hand pressure. If it slides in several inches, compaction is not your problem. If it stops short or takes real force, that area is compacted.
Test in a dozen spots and note where it fails. Compaction is almost never uniform: it concentrates in walking paths, gate areas, parking spots, and wherever children or dogs run. That pattern is diagnostic in itself, and it tells you whether to aerate the whole lawn or just those zones.
Drainage
After heavy rain, note where water stands and how long it takes to disappear. Water that sits for hours indicates compaction, a low spot, or a soil layering problem — and it will show up later as moss, disease, or persistent thin turf. Penn State notes poor drainage can often be corrected by breaking up compacted soil, though sometimes regrading or drainage tile is genuinely required.
Step 6: Read the Weeds as Site Indicators
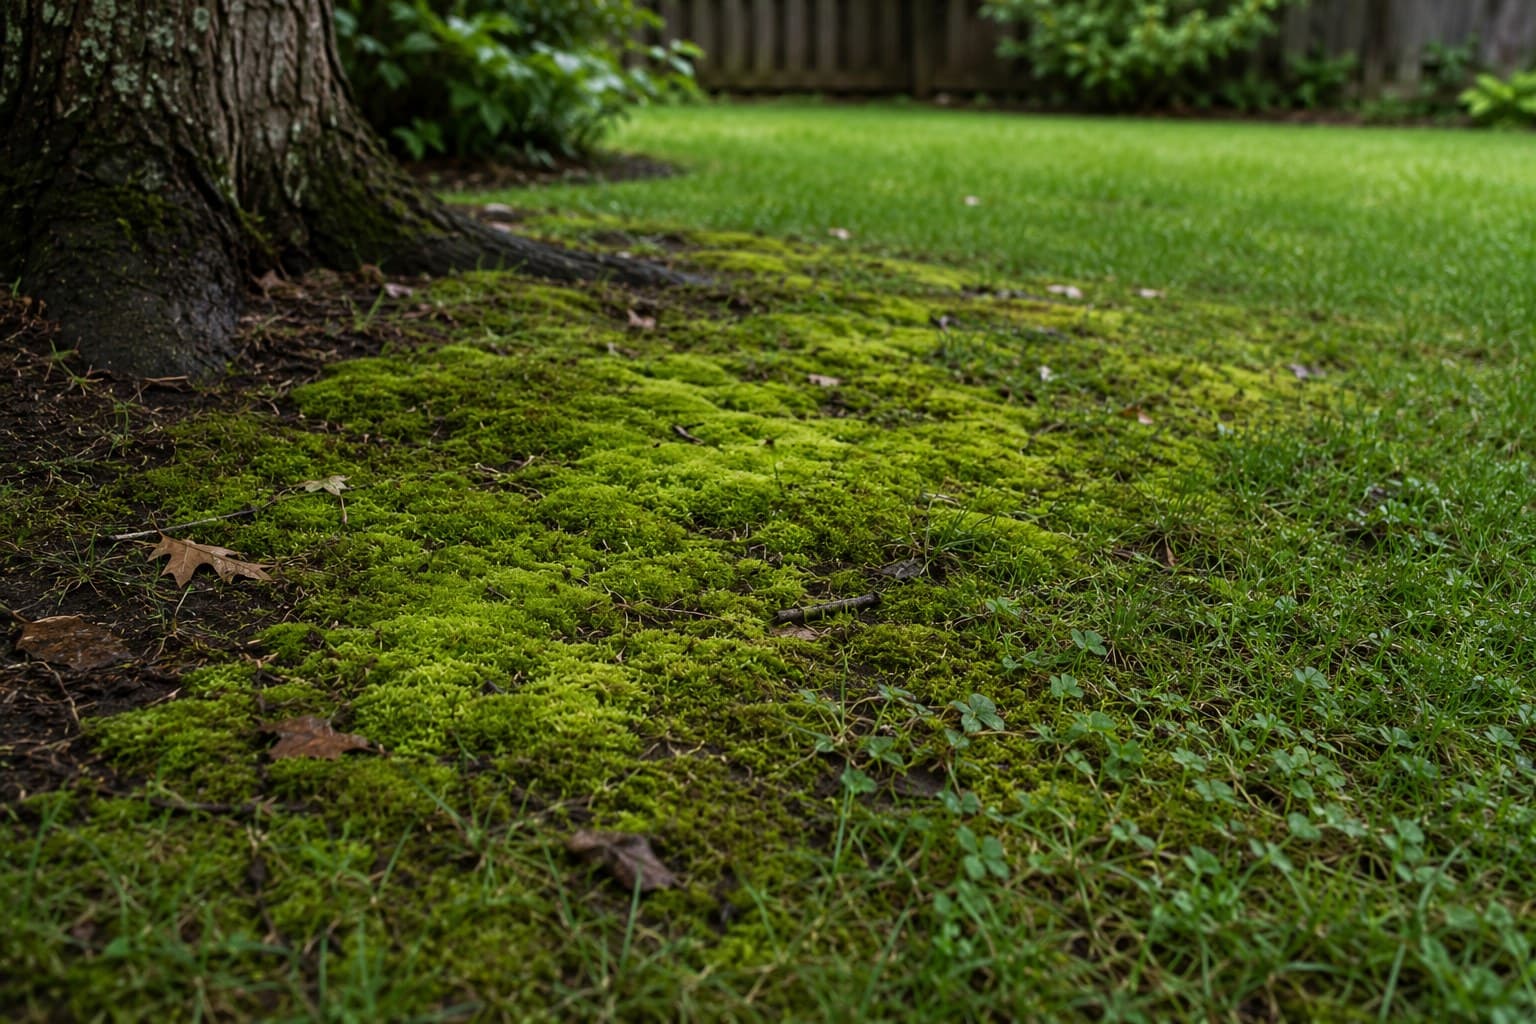
This is the most underused diagnostic available to a homeowner. Weeds are not random — each species thrives in conditions that suit it and disadvantage turfgrass. Penn State treats a dominant weed as evidence about the site. Identify what is winning, and it tells you what is wrong.
| What you see a lot of | Likely condition | What to investigate |
|---|---|---|
| Moss | Shade, acidity, poor drainage, compaction, low fertility — often several together | Light levels, soil pH, the screwdriver test, standing water |
| Prostrate spurge, goosegrass, annual bluegrass, knotweed | Soil compaction | Screwdriver test in that zone; consider core aeration |
| Yellow nutsedge, mouse-ear chickweed, annual bluegrass | Wet or over-irrigated soil | Your watering schedule and drainage after rain |
| Black medic, prostrate spurge, red sorrel | Dry soil | Irrigation coverage; check for a sprinkler blind spot |
| Violets, ground ivy, speedwell, common chickweed | Shade | Whether a shade-tolerant species suits that area better |
| Dandelion, plantain, chickweed | Compacted or heavy soil | Compaction, and whether mowing height is too low |
Treat the condition, not just the weed
Step 7: Check for Insect and Disease Damage
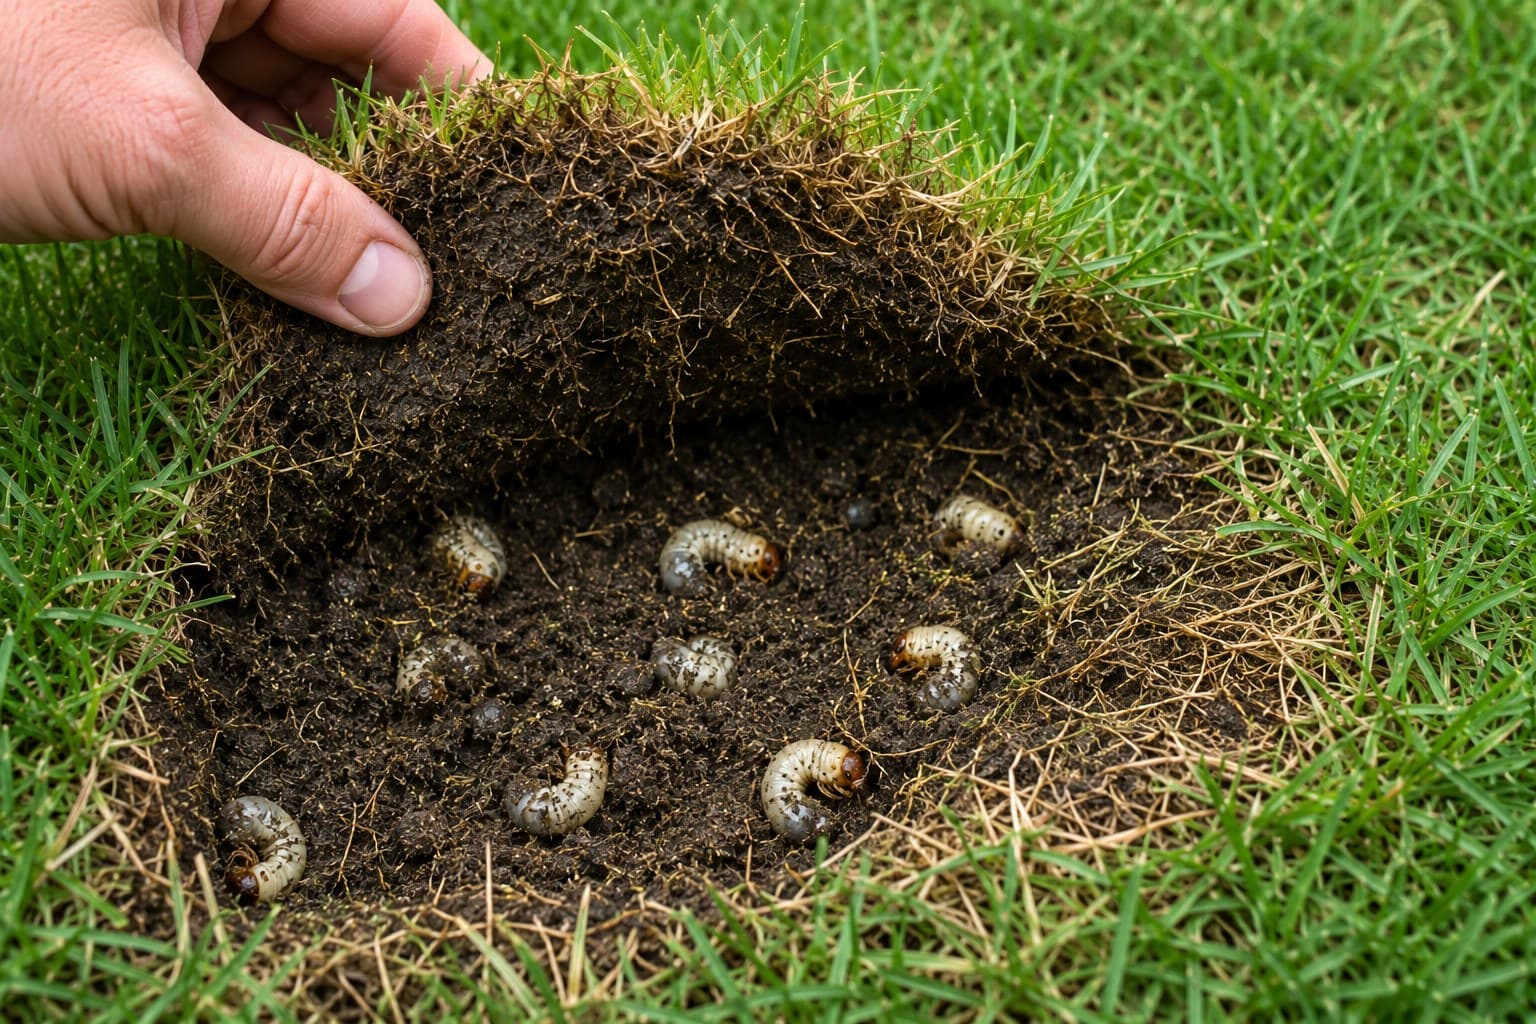
The tug test
Grab a handful of grass in a damaged area and pull. Healthy turf resists. Grub-damaged turf lifts like loose carpet, because the roots holding it down have been eaten. That single test separates root-feeding insects from almost every other cause of brown patches.
Counting grubs
Where the tug test fails, cut three sides of a square-foot flap, fold it back, and count the white C-shaped larvae in the top few inches of soil.
| Grubs per square foot | Typical interpretation |
|---|---|
| Fewer than 5 | Normal background population — treatment usually unwarranted |
| 5 - 10 | Common treatment threshold range, depending on species and turf health |
| Around 10 or more | Healthy unstressed turf may still cope, but damage is likely; stressed turf will not |
Turf health matters as much as the count — well-managed turf tolerates more than stressed turf, and poorly managed lawns show damage at lower numbers. Animals digging up the lawn is itself a strong signal, since skunks and raccoons dig for grubs. More detail in our lawn insects guide.
Disease
Note the shape and pattern. Rings, arcs and defined patches suggest fungal disease; irregular drifting areas more often suggest drought, scalping, or an application error. Look early in the morning while dew is present, when many diseases are most visible. Our lawn diseases hub covers identification.
Rule out the boring explanations first
Step 8: Send a Soil Test
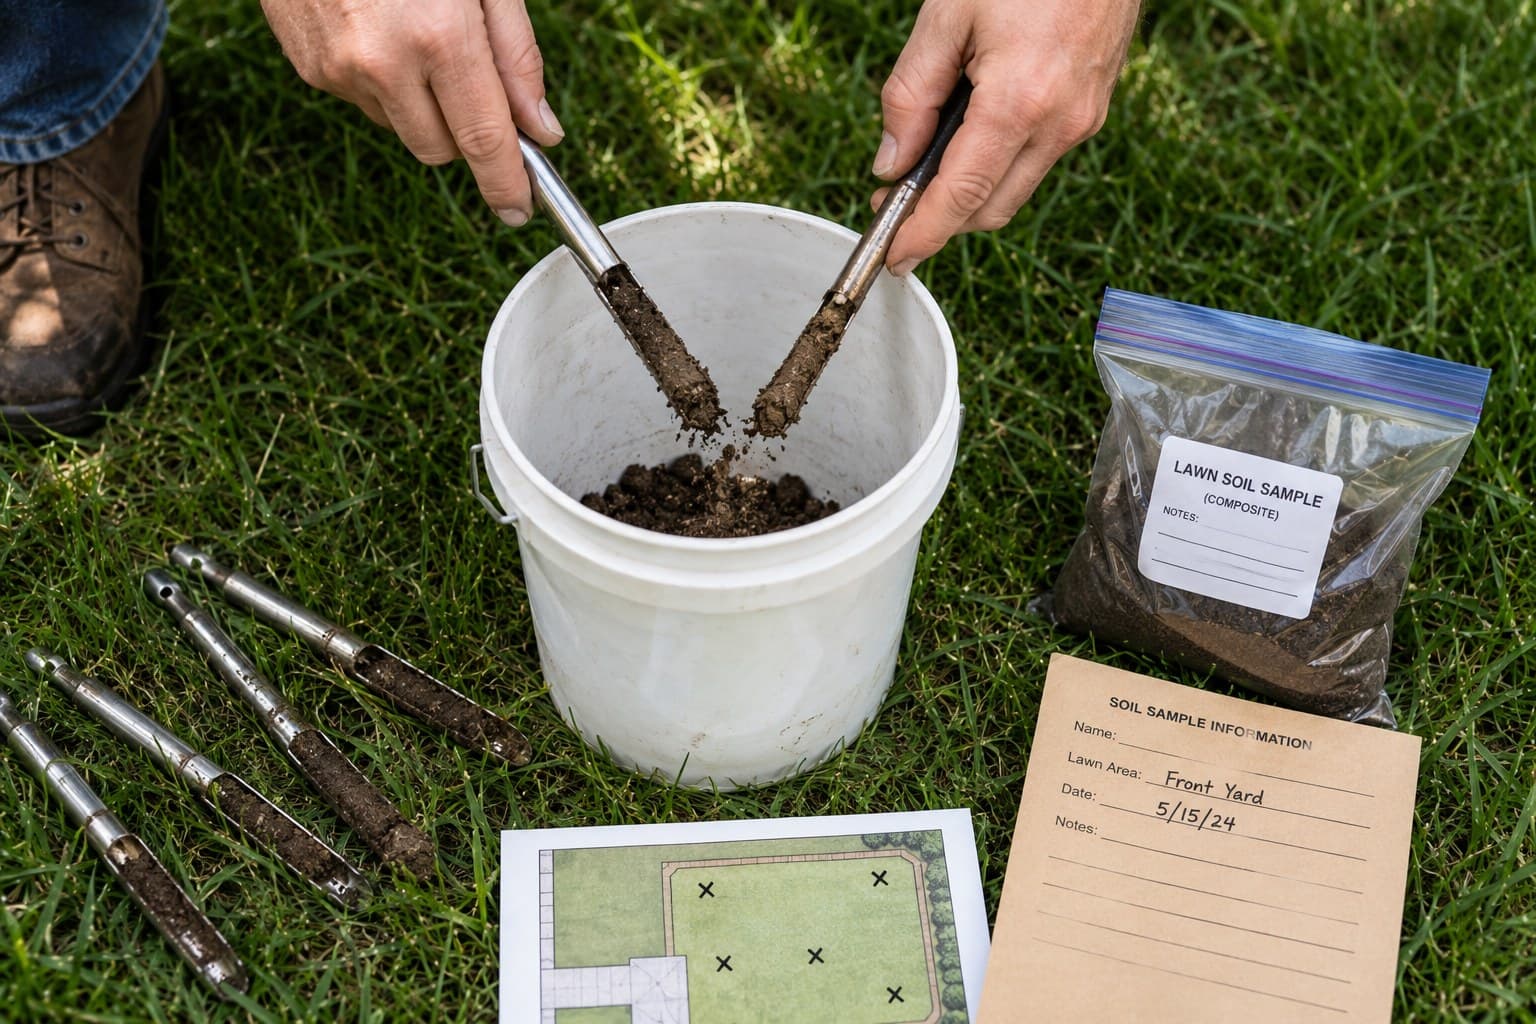
Everything above is visible. This is the part that is not. A soil test reports pH and nutrient levels and returns turf-specific recommendations, which turns fertilizer and lime from a guess into a decision.
Take cores from several spots and mix them into one composite sample, unless you are deliberately testing a problem area separately. Most turfgrasses do best around pH 6.0 to 6.8. Penn State recommends sampling three to four weeks ahead of renovation work; Clemson suggests two to three months ahead of a planting date, since lime in particular takes time to act.
Order through your county extension office. Full process in our soil testing guide.
Decide What to Do
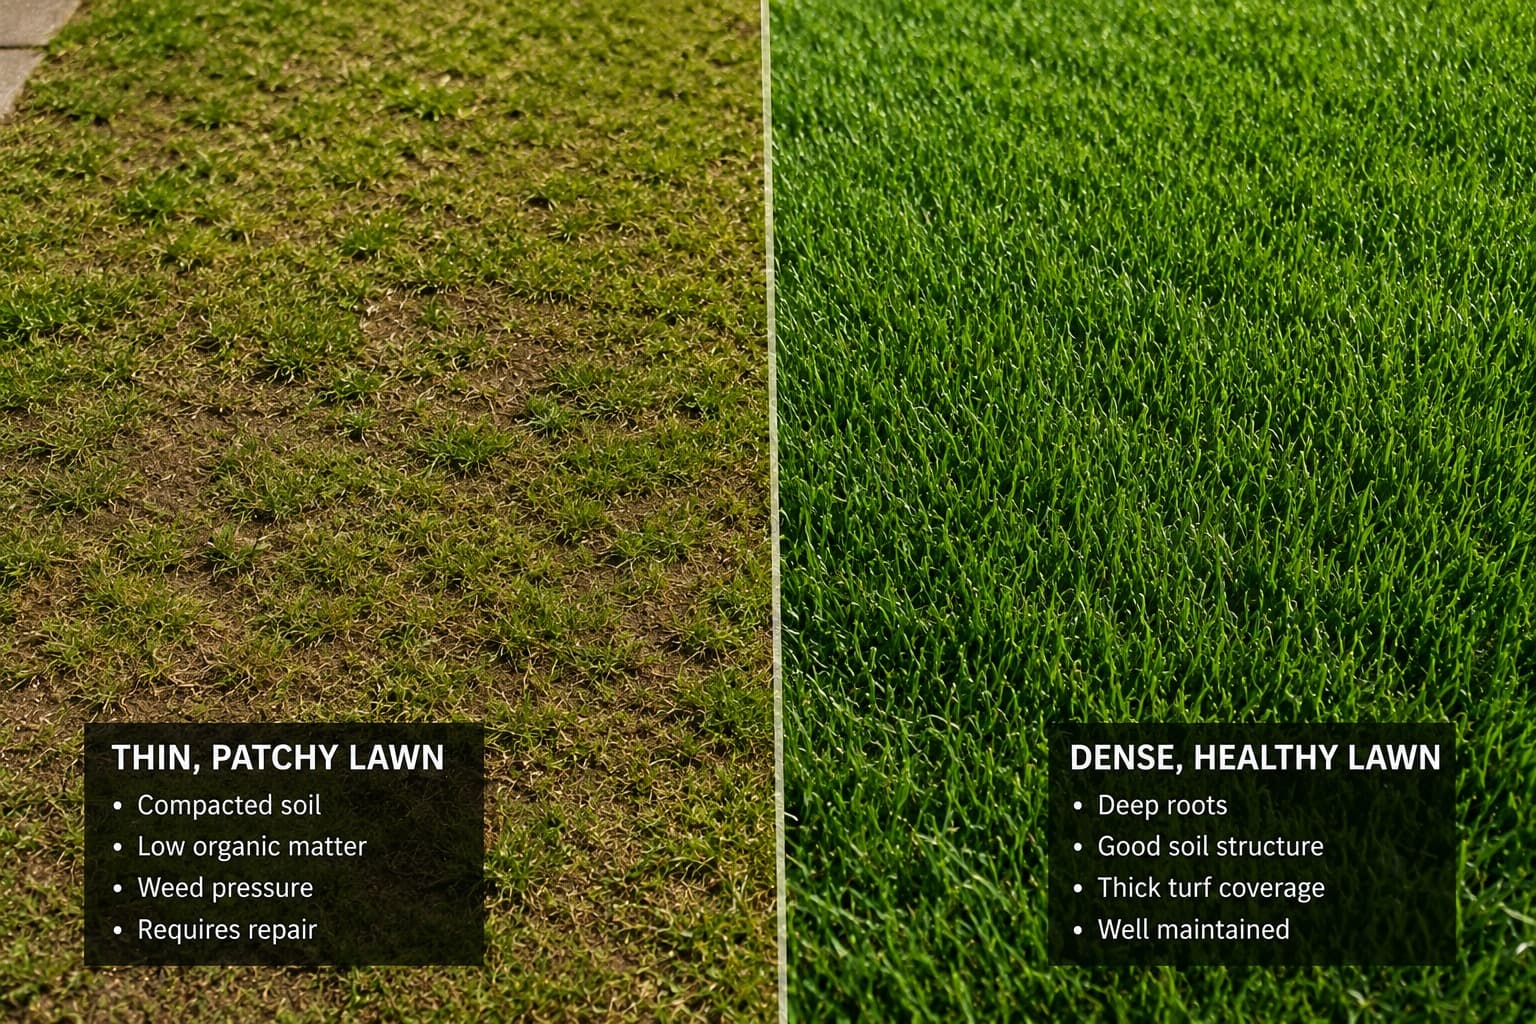
Put your findings together. The decision follows the same logic Penn State uses to select a renovation programme.
| What you found | What it calls for | Where to go next |
|---|---|---|
| 50%+ desirable grass, no perennial grass weeds, thatch under 1/2 in | Improve maintenance and overseed thin areas — no renovation needed | Fix mowing and watering first, then overseed |
| 50%+ desirable grass but thatch over 1/2 in | Dethatch or core aerate, then overseed | Dethatching guide |
| Under 50% desirable grass, or perennial grass weeds present | Kill existing vegetation and reseed the area | Renovation, then the establishment steps |
| Compaction concentrated in traffic zones | Core aerate those zones during active growth | Aeration, plus a route change if possible |
| Persistent shade under trees | Switch to a shade-tolerant species, prune for light, or stop growing grass there | Shade-tolerant grass selection |
| Grade or drainage faults, water standing for hours | Correct before anything else — planting will not fix it | Often a professional job |
| Soil pH outside roughly 6.0 - 6.8 | Apply lime or sulfur to the soil test recommendation | Soil testing guide |
If the answer is start over, our guide to starting a lawn from scratch covers the full establishment sequence. If the answer is better maintenance, the six fundamentals are where to spend your effort. If it is thin but salvageable, overseeding is the middle path.
Common Mistakes
- Buying products before assessing. The assessment usually changes what you would have bought. Doing it afterwards is doing it for next year.
- Assessing a dormant lawn. Dormant warm-season turf looks dead. Cool-season turf in a dry August looks far worse than it is.
- Never cutting a plug. Thatch depth, rooting depth and soil layering are all invisible from above and all decisive.
- Assuming compaction without testing. Aerating an uncompacted lawn is pointless work that stresses the turf.
- Dethatching a lawn with little thatch. Under half an inch, thatch is normal and removing it does harm rather than good.
- Missing perennial grass weeds. Nimblewill, quackgrass and bentgrass cannot be selectively removed and change the plan entirely. Most homeowners read them as ordinary grass.
- Treating weeds without asking what invited them. The weed is the symptom. Herbicide alone means repeating the job annually.
- Diagnosing disease before ruling out the mundane. Dull blades, pet urine, spilled fertilizer and sprinkler blind spots explain more brown patches than pathogens do.
- Assessing one spot and generalising. Sun, traffic, drainage and soil all vary across a yard. Sample the good areas and the bad ones.
- Skipping the soil test because the lawn looks fine. pH problems are invisible until they have quietly wasted several fertilizer applications.
- Reseeding the same failing spot every year. Persistent failure in one place is a site condition, not bad luck.
- Deciding to start over too quickly. A lawn at 50 percent desirable grass is usually recoverable without killing everything.
Expert Tips
- Water the lawn the day before you assess. The screwdriver test and spade work both need moist soil, and dry ground will read as compacted when it is not.
- Photograph each plug next to a ruler. Thatch depth is hard to recall accurately a week later when the soil test arrives.
- Sample your worst area and your best area separately. The difference between them is usually the diagnosis.
- Walk the lawn at 8am and again at 3pm. Shade maps change completely through the day, and midday observation overestimates how much sun an area gets.
- Check the mowing height you are actually cutting at. Measure it rather than trusting the deck setting, which is often optimistic once wheels wear.
- Look at the neighbours’ lawns. Same climate, same soil, often the same builder. Wide differences point to management; identical struggles point to a shared site condition.
- Keep the assessment sketch. Comparing next year against it is far more reliable than memory, and it is the only way to know whether what you did worked.
- Take an unknown weed or grass to your extension office. Free, definitive, and far faster than working through photos online.
Frequently Asked Questions
Acting on What You Found
The whole assessment is one afternoon plus a wait. Work in this order — each step informs the next.
- Water the lawn the day before, so the soil is moist but not saturated.
- Identify your grass type and note whether more than one species is present.
- Measure the area with the lawn area calculator and sketch sun, shade, traffic and low spots.
- Estimate the percentage of desirable turf, and look specifically for perennial grass weeds.
- Cut two or three plugs. Measure thatch, check rooting depth and look for layering.
- Run the screwdriver test across a dozen spots and map where it fails.
- Note the dominant weeds and what they indicate about the site.
- Tug-test any damaged areas, and count grubs if the turf lifts freely.
- Take a composite soil sample and send it to your county extension office.
- When results arrive, use the decision table above — then, and only then, buy something.
When to bring in help
About the Author
Jack is a lawn care researcher and former landscaping crew lead with 20+ years working transition-zone turf. He writes every guide here from university extension publications and turfgrass research rather than product marketing — after learning the hard way that most of what gets passed around on job sites is backwards.
Have a question or topic suggestion? Get in touch.
Sources and further reading
- Penn State Extension — Renovation of Lawns (causes of deterioration, the 50 percent desirable-turf threshold, thatch limits, renovation programme selection)
- Penn State Extension — Indicator Weeds Provide Insight into Growing a Better Lawn (weed species as evidence of compaction, drainage, shade and fertility problems)
- Penn State Extension — White Grubs in Home Lawns (grub counts per square foot and treatment thresholds)
- Clemson Cooperative Extension — Moss & Algae Control in Lawns (conditions that favour moss over turfgrass)
- University of Missouri Extension — Cool-Season Grasses: Lawn Establishment and Renovation (assessment criteria, bare patch size, surface preparation options)
Extension recommendations are calibrated to the state that publishes them, and thresholds such as grub counts vary with species and turf health. Where this guide gives a range, your county extension office can narrow it to your conditions. How we research and review guides is set out in our editorial policy.